Everyone Loves a Bunny Cake
Here’s a great DIY bunny cake just in time for Easter that looks awesome! Plus, it’s a great family cooking activity that’s sure to bring a smile to the faces around you. Make your very own BUNNY CAKE! Who can resist the cuteness? Plus, it tastes good so it’s a no-brainer! This cake even has the health benefits of coconut.
Don’t worry, even though this bunny cake looks amazing, it’s really not that hard to make. Included are multiple photographs of the different steps. We thank Jenny Stephens for the specific recipe and most of the step by step photos. The cover image is the cake I made a few years ago. I’m also going to include a few of my modifications and additions that I think made the final result slightly cuter! (And I promise that if I can do it, anyone can do it!)
Now, let’s get hopping on this bunny cake:
Bunny Cake Recipe and Step by Step Photos:
You’ll need:
- 3 sticks of butter, softened
- 2 1/2 cups sugar
- 6 extra-large eggs
- 1 1/2 teaspoons vanilla
- 3 cups all-purpose flour
- 1 teaspoon baking powder
- 1 teaspoon baking soda
- 1/2 teaspoon kosher salt
- 1 cup milk
- Shredded Coconut
- Parchment Paper
- 8-inch Cake Pan
- Cream Cheese Icing (see recipe below)
- Coconut(My additions)
- 3 jumbo marshmallows
- 2 black jellybeans
- 6 pretzel sticks
- 4 pieces of biscotti
- green food coloring
Directions & Step by Step Photos
- Preheat oven to 350 degrees.
- Cream together butter and sugar, then add eggs and vanilla.
- In a separate bowl mix together flour, baking powder, soda, salt and coconut. Add it to the butter mixture a little at a time alternating with the milk. End with adding flour coconut mixture. Do not over mix.
- You may want to line the 8-inch Cake Pan (and cookie sheets, and everything…) with parchment paper and then bake the cake for 30 minutes.
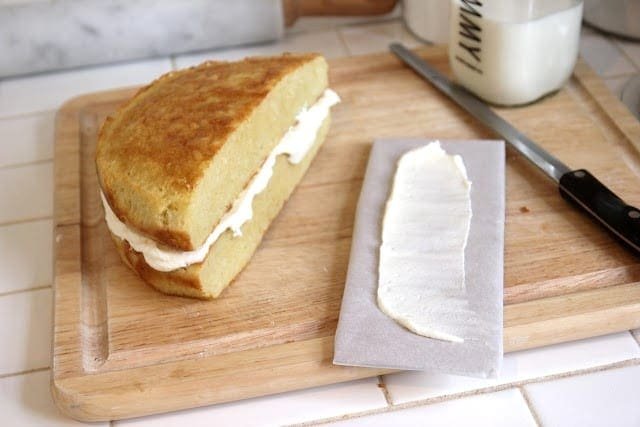
- See cream cheese icing recipe below. Make base for the cake to sit on by wrapping a piece of cardboard in parchment paper. You can use wrapping paper, printer paper or foil… whatever you have.
- Put a smear of frosting on the base to help the cake stick.
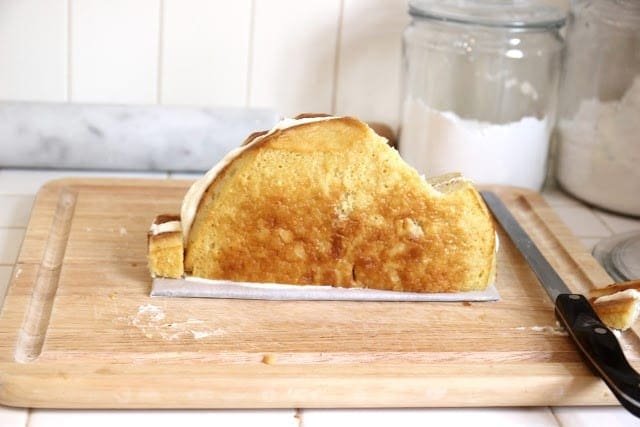
- Cut a notch out of the top to form the head. Use part of the scrap to create a little tail.
- Cover the bunny in icing. You may need to put it in the refrigerator then add a second coat if you like a lot of icing like me.
- Cover the outside with flaked coconut.
Ideas & Finishing Up
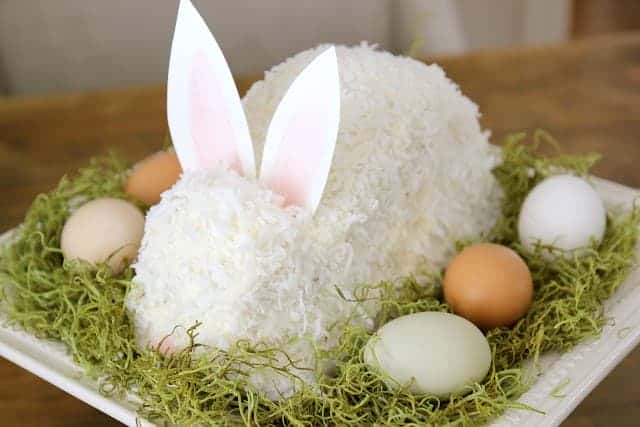
The original recipe says: I created the little ears by cutting them out of textured cardstock and painting pink centers with Emma’s watercolor paints. Granny used good ol’ fashioned pink construction paper. I added a little pink nose, too, but kept the bunny blank…
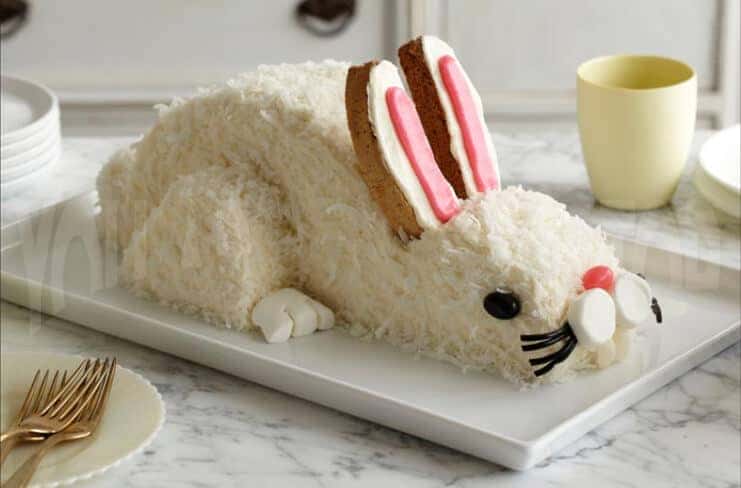
However, I used 2 biscotti for each ear, covered in icing and coconut like the body of the bunny. I added one marshmallow for his tail, and the other two as his nose. I stuck the pretzel sticks from the marshmallows to make whiskers. And the two jelly beans are, you guessed it his eyes. I also used green food coloring on the rest of the coconut to make him a little grass bed to lay in 🙂
As a result, I like my bunny better. But be creative and do what you think looks best! You can see the differences in the two bunnies below.
Cream Cheese Icing
- 2 sticks of butter, softened
- 1 block of cream cheese, softened
- One pound of powdered sugar
- 1 teaspoon of vanilla
- 1/4 cup of milk
Directions:
- Cream together butter and cream cheese.
- Add powdered sugar, vanilla and milk.
- Stir together until creamy – do not whip.
Again, for the original recipe, please visit Jenny Stephens‘ blog.